Thursday, April 28, 2011

Thank You! and The BFB Award!

Hi Everyone,

Today I have some Thank You's to pass out to some really wonderful people. Sometimes its the little things that count and thoughtfulness of good people that really make life enjoyable. I had a little bit of both this past week and want to Thank everyone!
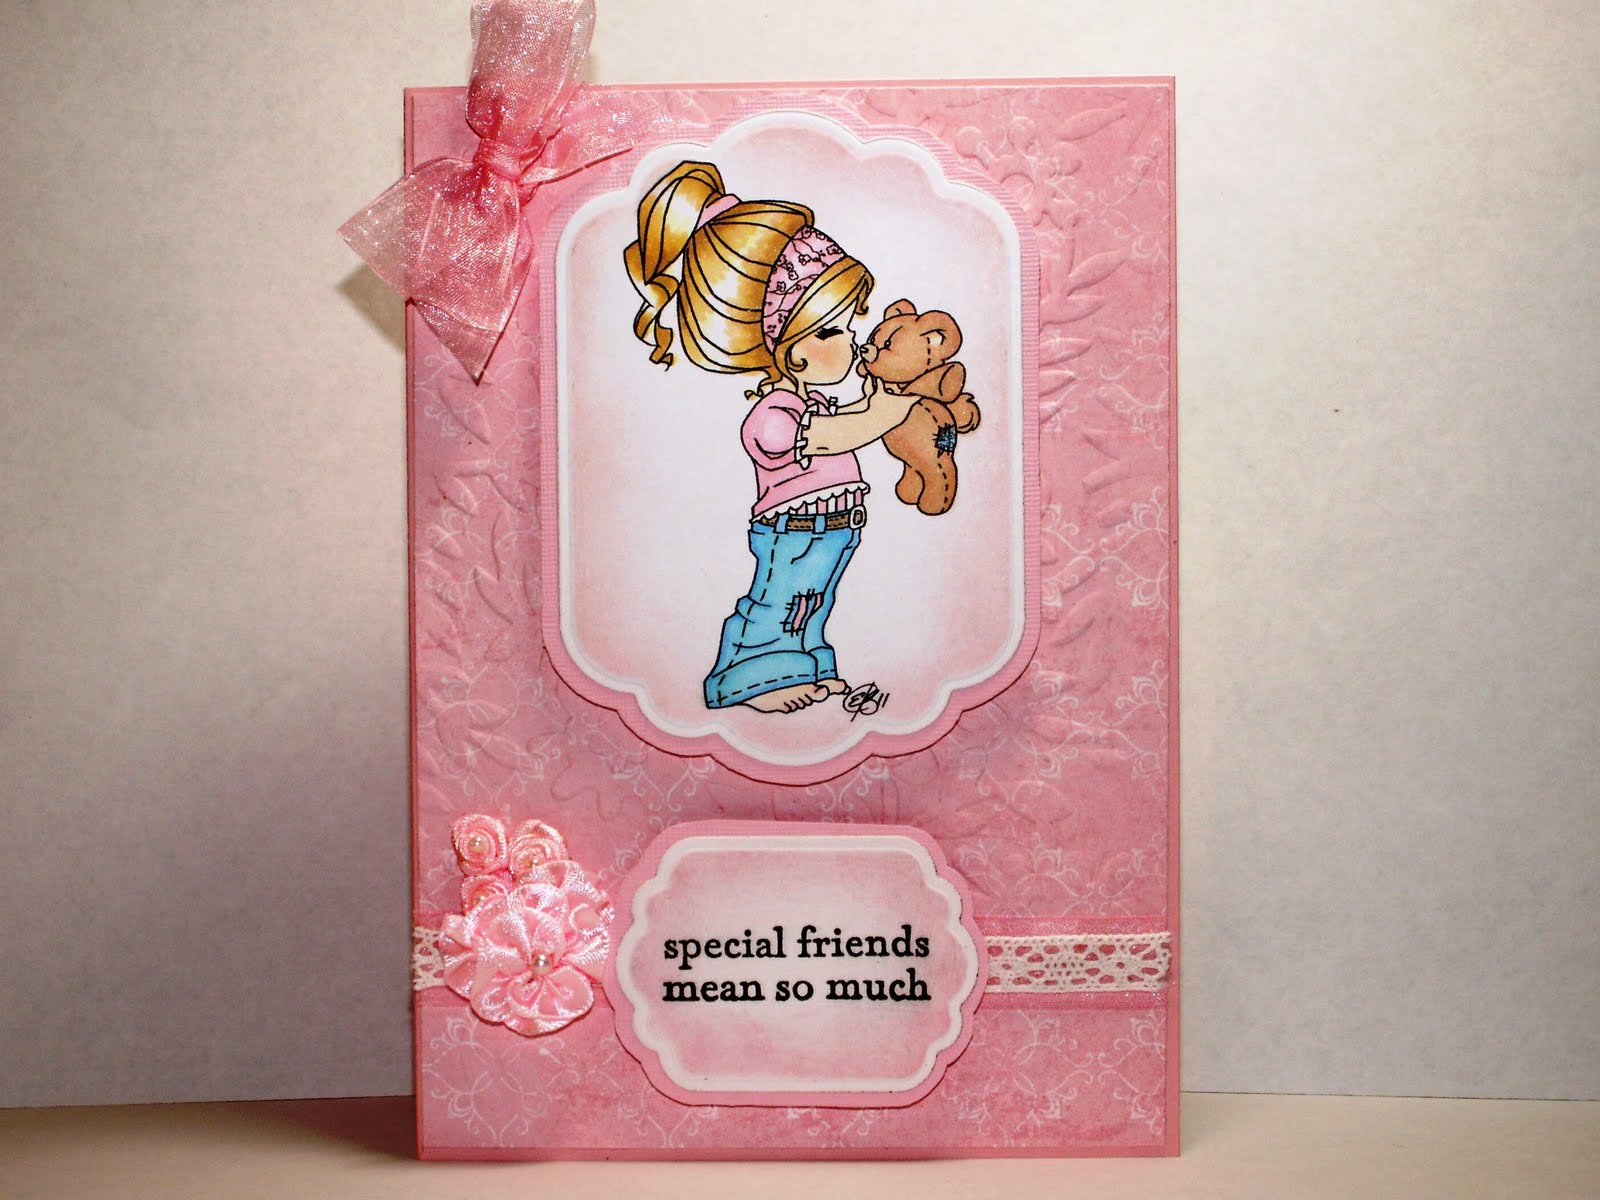
Pati's Kisses

First I want to Thank Lynda Nielsen from Lynda's Scrappy Place and who is also Co-Team Leader for The Digi Bells Design Team. I had stopped at the Digi Bells DT blog and Lynda had made a gorgeous card using a new Elizabeth Bell Digital stamp called Pati's Kisses (This link is the card that Lynda made). Along with her card, Lynda had a little Guessing game which was to be for fun. She asked three questions about her favorites that she included in her card. Well to my surprise...and everyone else...the next day I found out that I had answered the favorites correctly and another surprise, I had also won the Pati's kisses digital stamp! What a wonderful and thoughtful surprise!! Im still smiling here, it really made my week!

Below is the card that I made from this adorable Elizabeth Bell digital image. You can purchase this digital stamp HERE. I am also going to show a closeup of the image, which is so adorable!


The BFB Award


You know how sometimes something really nice happens when you least expect it and it just touches your heart? I had one of those moments on Sunday when I received an email from Patricia St. Martin who owns the Rubber Stamping is My Game blog. I visit Patricia's blog often and she makes some amazing cards! She had asked me to stop over to her blog because she had a surprise for me! Another surprise??? Wooohooo! Im starting to love surprises...LOL

Well to make a long story a bit longer, Patricia gave out some BFB Awards for visiting her blog and I was named one of the recipients. (Insert Huge Smile here). What a sweet thing to do when all I was really doing was visiting and enjoying myself admiring her work.


Here is what I found out about the BFB Award:
There are no requirements attached to this award. It is just an opportunity to recognize and say thank you to the wonderful cyber friends that frequent your blog. Without them..... our blogs would not be the same!!!

In the same spirit, I would like to pass it along to some of my regular blog visitors (listed in NO particular order). Thank you ALL for visiting my blog and putting up with some really rambling posts..LOL You all deserve a reward just for reading my blog some days! I truly appreciate each and every one of you and the support that you have shown to me in my short time (3 months) at blogging.

Please take the blinkie for your blog and pass along a smile to someone who may not expect it. I know it made my day!! Thank you Patricia!!

Patricia http://rubberstampingismygame.blogspot.com/ - Just incase you want another!! *Hug*

Lynda http://www.lyndasscrappyplace.blogspot.com/

Jalisa http://www.patchesofpink.com/

Vera http://lingshappyplace.blogspot.com/

Dana http://danasinspirations.blogspot.com/

Jane http://sneezy1956.blogspot.com/

Danni http://dannisdreamscrafts.blogspot.com/

Di http://disdigidownloads.blogspot.com/

Jodie http://www.bugaboostamps.com/home.html

Elizabeth http://www.softpencilstudios.com/

If I forgot anyone, please excuse my bad memory here. Please take the blinkie for your blog and pass it along too!

Have a fantastic week everyone!

*Hugs*
~Andrea

Friday, April 15, 2011

Patches of Pink - Win a chance to become a member of the PoP Design Team

Hi Everyone,

Today's cards are to remind everyone that Jalisa at Patches of Pink is holding a special link-up party and challenge in which the entrant with the most votes by their peers will be invited to become a PoP Designer. Jalisa will also hand-pick 2 entrants to become part of the Patches of Pink Design Team. The Challenge is anything Easter Themed.

Entries must be posted and linked-up by Sunday April 17th. Voting will run from Monday April 18th until Noon (EST) on Tuesday April 19th.

Here are a couple of cards that I made for inspiration. So stop over to Patches of Pink, link-up your Easter creation and leave Jalisa a comment to say Hello or let her know that Andrea sent ya!

Good Luck to All !!

*Hugs*
~Andrea

Saturday, April 9, 2011

Penny Black and Bugaboo Stamps *Updated*

Penny Black and Bugaboo Stamps Colored Cards using Copics or Prismacolor Colored Pencils with Gamsol

EDIT: I have updated to add in a couple more Bugaboo cards (one for a challenge) and another great Penny Black Image **

Hi Everyone,

As promised I want to share more of the cards that I made. These cards were colored with Copic markers and I also have one colored with Prismacolor Colored Pencils. You probably know by now that I cant resist cute images and these cards have some really great cute images. Thank You Penny Black and Bugaboo Stamps for making such cuties!!

ADDITIONAL CARDS ADDED:

Bugaboo Layer Challenge

I have made this card for the Bugaboo stamp layer challenge and have also entered it into the Papertake Weekly Challenge (See info below pic). The challenge is to use 4 or more layers and I think I achieved that with my 7 layers..LOL The outside stamp is FT Flower Tag 1 from the Flower Tags series. I also put another Bugaboo image inside for fun and it is the Violet from the Flower Watercan series. I colored it with Copic Markers.

I have also entered this card into the Papertake Weekly Challenge. The theme is Truly Dimensional and I think that this entry fits. Here is a link to their challenge, it looks like this is a fun weekly challenge to enter. Good Luck to everyone who enters!

Bugaboo Nurse Gatefold

This is a gatefold card and decorated with the Bugaboo digi stamp BAngel Get Well Soon which can be found under Angels in the Bugaboo Brat section.


Another Penny Black


This is one of the images from the Penny Black clear acrylic set Micey Day (30-028). These two little mice and the teacup are adorable and fun to color. I colored them with Copic Markers. The paper is Hero Arts Designer Paper.


I hope you enjoy these few additions to my blog and have a great day!

*Hugs*
~Andrea

Eat Cake

This first image is from the Penny Black Eat Cake clear acrylic set (30-066). As soon as I saw this image, I knew I had to have this set. I still smile when I see it. How adorable can it be??? LOL I colored this image using Prismacolor Colored Pencils and Gamsol. I love the soft effect that this technique gives to the images. I created the sky part of the image using Ranger Tumbled Glass Distress Ink. The background paper is one of the new Hero Arts Designer Papers. The Happy Birthday sentiment is a wood mounted rubber stamp from Anita's stamps. I cut the image out using Spellbinder Nestabilities.

Mouse Bouquet

This image is also from the Eat Cake (30-066) and is colored with Copic Markers. The mats for this card are made with Spellbinder Nestabilities and the card stock used is by Bazzill.

Bun Bun

When my daughter was about 3 months old (she is now 18), my Dad bought her a stuffed Bunny made out of silky material (like parachute material) and she fell in love with it! Being so creative (LOL), I named it Mr. Bun Bun and he became and still is my daughters favorite toy. Eventually the Mr. was dropped and he became Bun Bun. You know that one stuffed animal that gets dragged through everything, goes everywhere and is sewn more than it has original material. The poor bunny has been there when she was sick, sat in sweltering cars in the summertime while we went shopping or on vacation. And I was even told that Bun Bun used to drive my car and go to Arby's when we left him in the car! LOL Not that he ever brought us any roast beef sandwiches...LOL He became an important part of our family.

Well when I saw this Penny Black bunny and then saw the name, I knew I had to make my daughter an Easter card using it. The stamp is wood mounted red rubber and the name is Bun Bun (3620H). I colored him with Copic Markers and mounted him on Bazzill card stock using Spellbinder Nestabilities. The lace strip is from Hero Arts and is self adhesive. Love it! Bun Bun is lightly highlighted around the edges using Ranger Spun Sugar distress ink. Its such a pretty light pink color.


Bee Happy and Bee Mine from Bugaboo Stamps


This image is a digital stamp from Bugaboo stamps. I was trying my hand at monochromatic coloring and both are colored using Copic Markers. The Bee Happy mini stamp was a gift from a friend and the Bee Mine is from a clear acrylic set by Heidi Grace designs from Fiskars called Cheerful Bee that I got on clearance at Joann Fabrics.

On the Bee Happy card, the plain card stock is Bazzill. The polka dot DP is from Bo Bunny and the swirls paper is from the new Hero Arts Designer Papers. Simple rectangular layers gives real depth to this card.

The Bee Mine card is matted using plain Bazzill card stock. The DP is from DCWV (Die Cuts With a View). I cant remember the name of the paper pack since it has been used so much that I took off the top cover...LOL Its a 4 x 6 paper stack and is a couple years old, but has some great glittery paper. I just looked it up at the DCWV and am laughing since the name of the mat stack is: The Glitter Mat Stack...LOL Who would have guessed?? LOL


That is all I have pictures taken of right now. I am currently working on putting together more cards and hope to have more up soon.

Have a fantastic weekend and hopefully everyone will have great weather! Until next time...

*Hugs*
~Andrea

Friday, April 8, 2011

Stamp Store Cards and a Sympathy Card


These are cards that I made for display at a local rubber stamp store

Hi Everyone ! Hope that everyone is doing well this week. My week has been busy and once again the weather has changed on me and thankfully it is finally warming up. But we had to go through snow, sleet, hail and rain to get here, but today was absolutely gorgeous!! Wooohooo! Not that my legs could quite tell yet as the pressure changes seem to cause me troubles but it was worth it just seeing and feeling the sunshine again!

I first want to share some cards that I made for the local stamp store for display which were quick and simple to make. Hopefully one might give you some inspiration to try them.

After the stamp store display cards is a sympathy card that my daughter had asked me to make. Since it turned out so nicely, I wanted to share it if anyone would need an idea for a quick and simple sympathy card.

Party Hat Card

This first card has no coloring on it, but I enjoyed making it so much that I wanted to share it with you. It is a card that I made for display down at the local stamp store. It is using Hero Arts Stamps and papers and a plain A2 sized card and some color graduated ribbon which was a gift from a friend. The ribbon is so soft and pretty and it really makes this card.

To make this card its super simple...I took a plain white A2 (4 1/4" X 5 1/2" ) card and cut it on my paper trimmer starting from the bottom corners and using an angle to leave enough room to make a hole for the ribbons to come out of and for the card to open and close. I left about 1 1/2" at the top of the hat. To place the ribbons, I wrapped the ribbon around my first three fingers several times (about 8-10) then used a small piece of ribbon to tie it together making a circle of ribbon (like an O ). I then held the knotted place and cut the ribbons opposite the tie. This made them into streamers. I cut a small oval into the crease of the top of the party hat and inserted the knot of the streamers inside the card. I then taped the ribbons on the inside of the card with scotch tape. If you leave your knot ends outside of the card, the inside looks very neat and tidy with just a small slit of ribbon at the crease.

Using Hero Arts new Life of the Party Birthday (CL514) and Cutouts (CL515) Clear Acrylic stamps, I stamped the images and added paper as shown on the card. Super Simple and it was done in less than 10 minutes and that Included clean up! LOL Try it with some of your favorite birthday paper or stamps and see what you can come up with!


Poppy Card


This next card was my weak attempt at trying to make a card that I saw online which used a stamped image and matting and used the right side outline of the stamp to create the edge of the front of the card. The card that I saw had a sentiment showing from inside the card, but unfortunately I do not have any sentiments that read vertically so I left it blank. You should get the idea of what I was trying to achieve, and it wasn't too bad for my first attempt at freehand cutting. LOL

The image is one of the Poppy images from the Hero Arts clear set Delicate Blossoms (CL449). I love this set and the poppies are so much fun to color. I colored them with Copic Markers. Please excuse the white card on white background. I should have used a colored background to give more contrast. Sorry!!


Rose Thank You!


This card was made using Hero Arts Luscious Patterned Flowers (CL508) and Luscious Frames (CL509) and is another display card for the Stamp store.

There is no coloring involved on this card, but I really enjoyed making this card because I actually got the sentiment to fit perfectly inside the frame on the very first try! ...LOL I also love the look of the card. The roses were stamped in a darker ink and using Ranger Distress Ink, I sponged on the color to the flowers. I then cut out the roses and leaves and attached them with glue dots.

A slit on each side of the frame was used to pass the ribbon behind the sentiment and around to tie the bow. I love how it turned out!

Even though it is a Thank You card, it could easily be used as a Mother's Day card. I always used to put a little Thank You inside of the Mother's Day cards that I gave to my Mom. So if you still have your Mom around, don't forget to say Thanks for all of the great things she does. Without her, you wouldn't be here ...that's worth a Thank you !!


Button Flower


Yes, Its another display card for the stamp store. I had fun making them and always enjoy it when a customer makes a copy on our color copier and buys the stamps to make the cards at home. Its such an ego boost! LOL

Again, no coloring involved, but instead I used distress ink for the flower and my Lipstick Red Copic to color a white button a really gorgeous RED! I love using my Copics to make ribbon or buttons that match my image. This red button just seemed to add the right spark to the card.

The stamps used in this card are all from the Hero Arts clear acrylic Luscious Patterned Flowers (CL508) set. I 'colored' the flower using Ranger Wild Honey Distress Ink. Since this is a reverse stamp, just ink it up and stamp the image! I then cut it out to create more depth to the card. The leaves and Thinking of You sentiment were stamped using Ranger Peeled Paint Distress Ink. They are stamped directly onto the card mat. A small scrap of Hero Arts Sunshine Designer Paper (PS630) was added below the white mat. I used a small piece of twine and tied to the front. I added the red button with a small piece of twine to the center of the flower with a glue dot. This is another quick and simple card to make and takes very little supplies. The card itself is a deep red card stock which I lined with white.


That are all of the store display cards and I Thank you for sticking with me while I went into my rambling detail. Please let me know if I go into too much detail, I just never know how much info to add.

This one final card was made for my daughter and her friends.

Sympathy Card

My daughter asked if I could make a sympathy card for a classmate who's father passed away unexpectedly I made the following card so that Shannon and her friends could sign it and give to their friend. I embossed the image and sentiment using Ranger Silver Pearl embossing powder. The picture was taken with the card in its protective plastic bag, so please excuse the glare.


I am hoping to do another post before this weekend is over and to share with you cards that I have actually made using colored images that I completed. Stay tuned for them!! LOL

I hope that everyone is having warmer weather now and that the sun shines brightly until I ramble on at you next time.

*Hugs*
~Andrea

Friday, April 1, 2011

Mimi the Easter Bunny and another Di's Digi !

Sorry for being such a blog slacker lately, but not only have we had cold and snow, we have also had a couple really nice days then a huge hail storm, falling temps and a tornado that touched down east of Pittsburgh a couple weeks ago. Its been absolutely CRAZY weather here lately!! We are currently having another cold spell and had some snow which many of you know is my arch-enemy. So when my legs hurt, I dont like to blog, chat or even email. Im hoping this weather will soon warm up for that early spring we were supposed to have....yeah right! I have to have another talk with that groundhog it seems!!

While I havent been around I have made some cards that I want to share with you. I still have to take pictures of about 6 or 7 of them, but will share the ones that I have pictures to share.

Mimi the Easter Bunny

The following Penny Black Mimi Bunny image was perfect to make Easter cards for the lss store owner's (Margie) granddaughters. Since I wanted them all to be the same , I decided on Mimi in the bunny outfit from the Mimi and Miles clear acrylic set. The lamb and the inside chick are from the Penny Black Fresh New Day set. Please excuse the color of the cards, they are brighter in real life, but with the cold weather we have also had overcast skies.

Here is a little tip from making this card:
I paper pieced the lambs head and body, but had stamped the image directly to the background DP. I love how it turned out and no need to cut out those teeny tiny legs, ears and flowers!! I colored the cards with Copic Markers and used Spellbinder nestabilities for the ovals.

On the inside of the card I made a little surprise. From the Fresh New Day set there was a very very tiny chick which I thought was adorable. I used my 7/8 inch oval punch and using the DP, I punched out little 'Easter Eggs'. I then slipped them into the corner of my Stampin' UP! designer label punch and created a type of cracked egg look. I then took the chick and glued them to the inside of the egg and added them to the inside of the same colored card. Just a little something for the inside of the card which sometimes is forgotten.

Another tip from this card:
The Happy Easter sentiment on the front of the card is from a $1 clear acrylic stamp that I actually cut apart to just get the sentiment. I normally would not cut apart my acrylic stamps, but since it was $1, I figured the worst I could do is destroy it, and honestly I may be cutting more as I need them. It really worked well and you can actually reassemble the clear acrylic stamps back together for the entire image on your acrylic block. I used a Stampin' UP! word window punch for the sentiment.

I do not own many Stampin' UP! items, but the ones that I do own I find I use quite often as when I bought them I did for a certain purpose that I would use often. So for those of us who are very budget conscience, make your craft purchases count. Buy things that will last and maybe pay a bit more but in the long run, you can use them for many different purposes. Dual purpose items and quality items make a huge difference when making cards.

Speaking of quality items.....As many of you may have on your wish list is an ATG gun, here is a tip that I used to get mine. I first tried every type of adhesive I think there is known to man. Glue, double sided tape, runner after runner filled and refilled with adhesive that ran out on every other card it seemed. I finally found an ATG gun that fit my budget and my pocketbook for refills. I purchased the newest Scotch Pink ATG (Advanced Tape Glider) gun which holds 1/4 inch adhesive rolls. The rolls of adhesive are 36 yards in length and refills are sold in a box of 2 for 72 yards of sticking any and everything you can think of. The gun (using a coupon) was under $30 and the refills were less than $5 and they last what seems like forever. The adhesive is also acid free for those scrapbook memories. At first it took a bit getting used to since it is larger than I realized, but within a day, I was taping like a pro. I also like the 1/4 inch size of adhesive since you can use it on small areas, and I feel it is a good investment to save on adhesive purchases.

I still use my Xyron machines...yes, machines...I have the X, the 2 1/2 inch and the 5 inch when I either have very tiny items or want to glue a full sheet on the front of a card. I find that it saves time and they are also good for making sure that your items stay on your card. Nothing worse than having something falling off of the front of your card!

And where would I be without my pop dots? Foam dots and Stampin' UP! dimensionals are also staples in my craft stash. Glue dots are another good purchase since they are clear and you can add some minis to hold down a bow, or tuck a pieced image to your card. They come in a variety of sizes and they even have one for Vellum.

Ok...Sorry for rambling about adhesives..LOL

I have one final card to share with you today only because it was also for Margie for her Granddaughter's birthday. When I made this following card, you will see that it was a Miss You card. When Margie saw it, she said it looked just like her granddaughter Taylor who is turning 6, so I revamped the card and changed the sentiment from Miss You to 'Taylor is 6 ! ' . Nothing else was changed, I just took the card and replaced the sentiment and reattached the front. It makes a much better Birthday card than a Miss You card anyway! The image is from Di's Digi Downloads and there is a link to her adorable digital images on my right sidebar. Please stop over to see Di, her images are so cute and you will find something for every occasion! I also colored the image with my Copic markers. The little dog did not have patches of white, but as I colored him, I thought he would look cute if I gave him a few. I think he is so cute!!


Thanks once again for enduring my ramblings, and hope that everyone has a wonderful April Fool's Day without any trickery!!

*Hugs*
~Andrea